I am the host of the Bitten by the Bug 2 challenge for this two week period and I chose the theme “For the Men in our Lives”. Sometimes it is hard for people to come up with masculine cards, but I know how much the men in my family appreciate the cards I make them.
Every year I choose what type of birthday card I will make for my family (and that number is now up to seventeen.) I found a card called a fling card on Pinterest which is a variation of the waterfall card and thought that would be a good one for this year. I watched a video by Srushti Patil found here. Since I will be making so many of these cards, I decided to make a pattern on Design Space rather than cutting them by hand each time. I also decided that I would make a separate post on the process of making the actual card which can be found in this post.
The cut file I made for making this card uses only the basic shapes so anyone on Design Space can use it. The project is called Fling Card 2 and can be found in the community in Design Space. If you want a direct link, let me know in the comments. One thing I did learn in making these is that it works better with 100# cardstock as the base card. The flipping cut as well as the base pages that flip work better with a lower cardstock, but not paper. However paper can be used for the decorative elements.
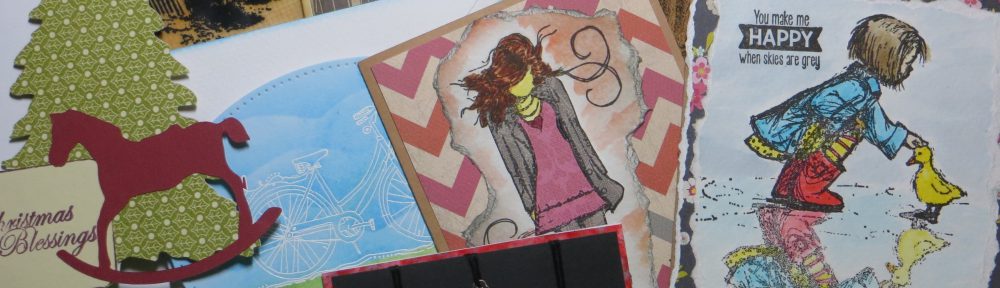
My birthdays start with my father and brother who share a birthday as well as my sister-in-law whose birthday is the day before theirs. This is my father’s card and the different views as the pages flip (or fling if you do it fast) over when the panel is pulled out of the side.
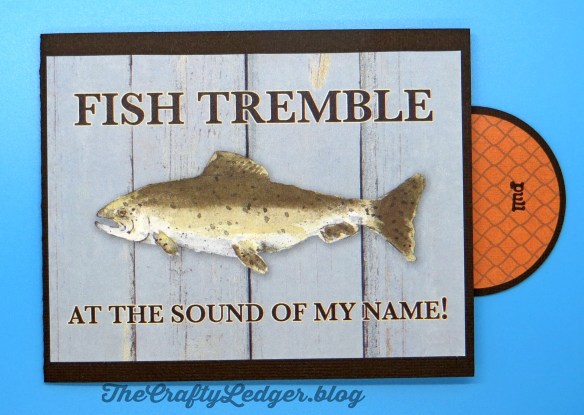


And here is my brother’s card.


Check out the Bitten by the Bug 2 blog and link up your male project here. and let’s see those masculine inspirations using your Cricut.

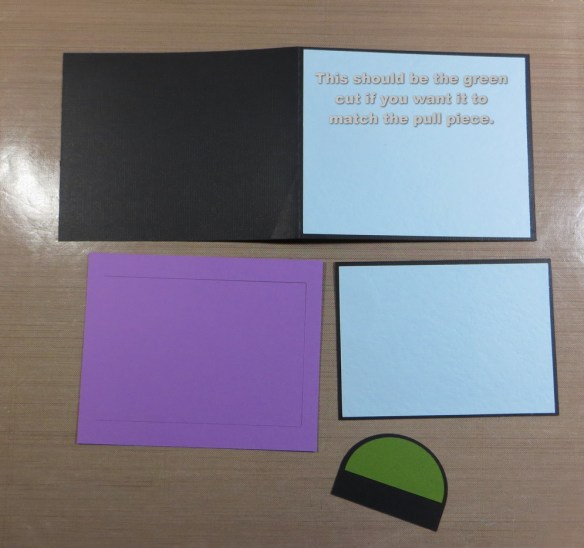
 The purple piece is the flipping mechanism and if the inside corners don’t quite cut, carefully snip them.
 Fold on the scored lines as shown.
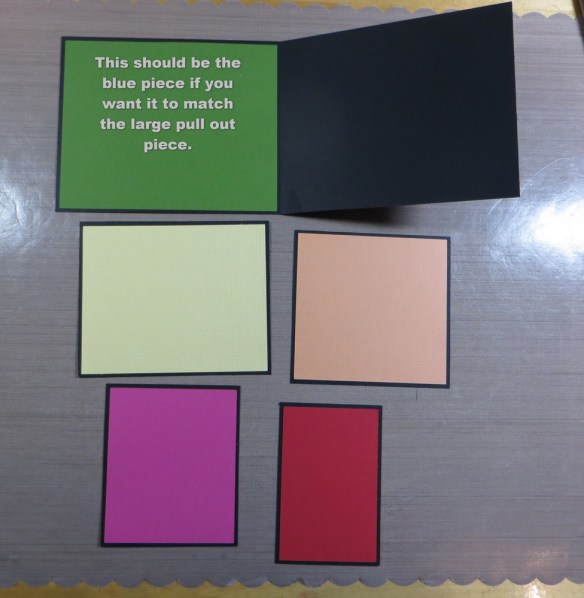
 Here is the pull part taped to the pulling mechanism.
 Here is the glue around the back of the mechanism with the panel back in place. I have used both glue and double sided tape. The glue is forever and can’t be moved after a few seconds. With UnDo, I can remove the double sided tape if need be to re-position the panel on the base, so I will probably do that in the rest of my cards. (Also the pull tab is now one piece, not taped on like in this picture.)
 Here it is after gluing or taping it on the base.
 Glue or tape between the first score lines to attach the largest inside panel (the yellow on the picture of the pieces.) Line it up with the left edge of the inside panel just inside the left edge of the glue (you should just see the purple) and centered top to bottom. Slide the tab out helping that panel flip and the next fold shows. Glue the next portion the same way and put on the orange panel the same way. Next is the dark pink panel and finally the red panel which is glued on a larger part since it doesn’t flip.