This year I decided to make something called a fling card (which is a modified waterfall card) for my family birthday cards. I found the basic design on Pinterest and this video by Srushti Patil found here.
The video shows all of the measurements in cm, so I changed my board to be cm instead of inches. After I made all of the parts, I changed the board back to inches and found that the base was too big to fit on a 12 x 12 cardstock, so I sized everything down to the base being 11.5 inches wide. This worked out well and the finished card ended up being around 5 x 7, so it would fit inside an envelope made for a 5 x 7 (A7) card.
After making three cards, I realized that I could attach the pull part to the slide by welding to make one piece and it makes it work better. This is how the final canvas looks. The cut file will cut and make the score lines. I have made the file shareable and since it only uses the free basic shapes, it available to anyone on Design Space by searching Fling Card 2 in the community projects.
Here is how the mat looks for the design. 
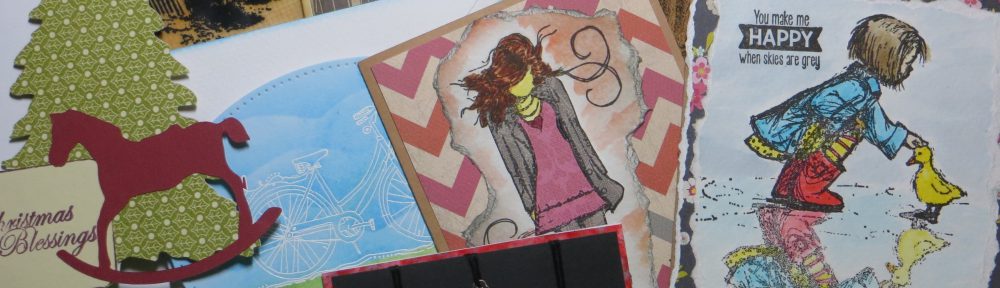
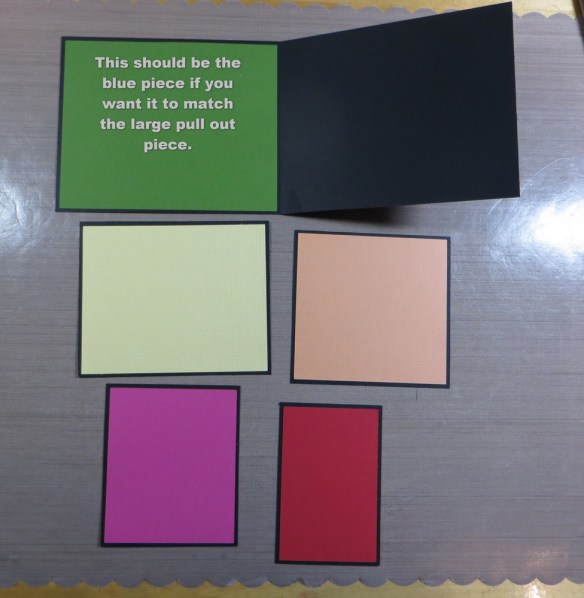
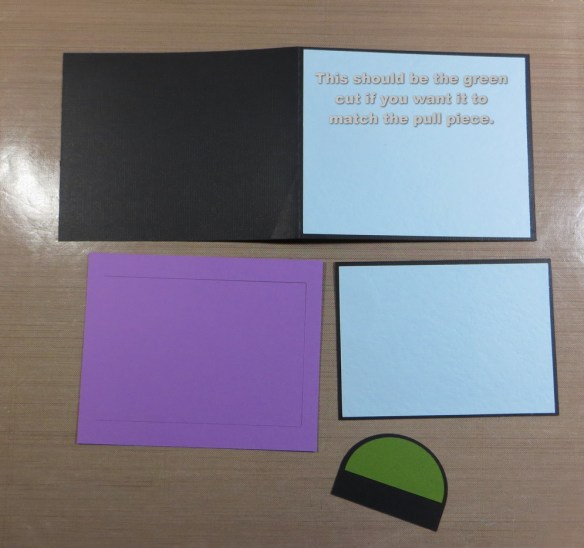
You can watch the video referenced above for putting the card together. Here are my photos for my prototype. The only thing is that the front should be green to match the pull tab and the inside front should be blue to match the pullout panel (if you want them to match).
 The purple piece is the flipping mechanism and if the inside corners don’t quite cut, carefully snip them.
 Fold on the scored lines as shown.
These are shown with the decorative pieces shown glued to the flipping and base pieces. Note that on the newer design, the pull tab part (half moon shape) is part of the pull panel and not separate which eliminates the need to tape it on. It is also better to put on the decorative piece on the pull tab after it is put together since it is easier to line up that way.
 Here is the pull part taped to the pulling mechanism.
 Here is the glue around the back of the mechanism with the panel back in place. I have used both glue and double sided tape. The glue is forever and can’t be moved after a few seconds. With UnDo, I can remove the double sided tape if need be to re-position the panel on the base, so I will probably do that in the rest of my cards. (Also the pull tab is now one piece, not taped on like in this picture.)
 Here it is after gluing or taping it on the base.
 Glue or tape between the first score lines to attach the largest inside panel (the yellow on the picture of the pieces.) Line it up with the left edge of the inside panel just inside the left edge of the glue (you should just see the purple) and centered top to bottom. Slide the tab out helping that panel flip and the next fold shows. Glue the next portion the same way and put on the orange panel the same way. Next is the dark pink panel and finally the red panel which is glued on a larger part since it doesn’t flip.
The best way to understand all this is to watch the video linked above. I will have two actual cards to show you tomorrow using this file and will be shared on Bitten by the Bug 2

these are super cool! I have to try one!
LikeLike
Thanks Alicia.
LikeLike
Pingback: BBTB2 For the Men in our lives | The Crafty Ledger